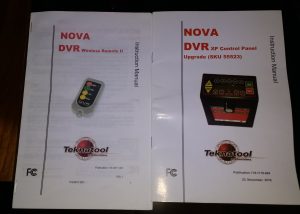
 Before undertaking this task please ensure you have both the NOVA DVR XP Control Panel Upgrade and NOVA DVR Wireless Remote II Manuals to hand to make installation straight forward.
Stage 1.
- First, locate the 2 screws on each side of your control panel and loosen all of them, the screws do not need to be removed completely.
- The panel can be removed with a gentle forward pulling motion.
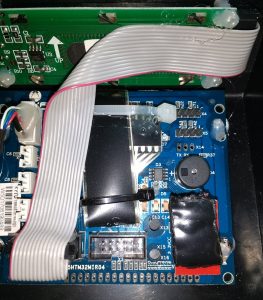
- When you pull the Control Panel completely away from the lathe body you will find it connected to the lathe via a grey ribbon cable with a RED Edge.
- This picture shows the interior of the display/control panel where you plug in the little board supplied in the box with your Remote Control.
- The small board can be seen in the bottom right-hand corner of the photograph. The board is covered in black plastic tape and has a RED edge that is just showing. Simply plug it in.
- Check that all your cable connectors are all correctly seated on the blue printed circuit board.
- Place the complete assembly on to the side of your lathe and secure the 4 screws that were undone at the start of this procedure.
- Apply the electric supply and switch on. The screen will scroll through its various messages and then show your normal preset startup speed, normally 500 RPM.
Stage 2.
Well, this should have been a simple task but due to a number of small factors, it was not but it was not a disaster.
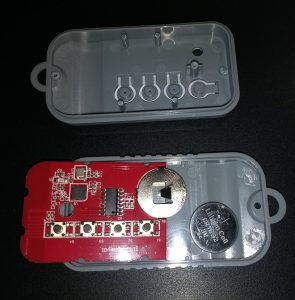
- Take the Remote Control Unit and undo the two small screws, then split the case in two using your fingernail.
- The first problem I came across was fitting the battery into the Remote. No indication of Battery Polarity was provided and so you could insert the Button Battery in the wrong side up and that might have disastrous results. Luckily I guessed correctly, the battery should have the + Sign facing upwards when inserting it into its holder, see the photograph alongside.
- I guessed correctly and the indicator light came on, OK so far.
- Re-assemble the case.
Stage 3.
- Read and follow the instructions on Page 17 of the DVR-XP Upgrade Manual, ignore the manual that came with the Remote Control package as it HAS NO CLEAR INSTRUCTIONS.
- I will hold my hand up and say I tried using the Remote Manual and by using the “engineers time honoured approach of pushing buttons after reading the Remote manual” got it working.
- Then I had Archimedean or Eureka Moment and thought why not look in the DVR Upgrade manual and guess what that is where I found the answer.
- Powered up the DVR, pressed the Programme P Button to select Wireless Remote followed by pressing E Selector Button to configure the Pairing Process between Remote & Lathe. No problem.
- Found that I could Switch Lathe Off, Increase & Decrease the Speed but I could not SWITCH THE LATHE ON USING REMOTE.
- Again the answer was in the manual on Page 20. YOU HAVE TO HOLD THE “ON” BUTTON ON FOR 2 SECONDS, not as the instructions read “To start the lathe with the remote, press and hold the Start/Stop button for 2 seconds.”
- Yes, it worked! They need to sort out the misleading instruction and someone should have checked this typo and the even bigger errors in the Remote Manual.
Stage 4.
- As I said it works as I would expect.
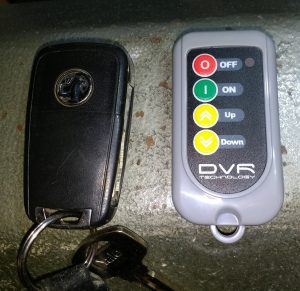
- My major complaint is the size of the Remote Control, the photograph alongside shows it compared to my car key remote fob.
- Very easy to lose in amongst the shaving of a woodturning workshop.
- Would have been better if it was at least twice the size and also if it had a magnet on the back so it could be left on the lathe.